I enjoy sharing my experiences with various products. I am currently ranked in the top 10 Amazon reviewers and found that I really enjoy writing them. Some people who found my reviews helpful suggested that I start a product review blog. I hope you will find this blog useful.
I am a participant in the Amazon Services LLC Associates Program, an affiliate advertising program designed to provide a means for sites to earn advertising fees by advertising and linking to Amazon.
Here are some of the reasons why:
1. It provides good coverage without being heavy
2. I found that it stays on and I do not need to reapply it
3. Small size fits nicely in a purse
4. Has nice cucumber-like smell (although I would have preferred unscented)
A note on price. I noticed that the price on the on this product fluctuates and sometimes runs too high. There is a nice online tool that I use to help catch a good price on Amazon, this tool is called "Online Price Alert". This tool will send you an email when the Amazon item price reaches the target price range that you specify. If you search on "online price alert" in Google it will be come up at the top. I find this tool to be very helpful.
Be careful not to mix-up filters for 1800 and 1810 models of this vacuum cleaner
PVF110 is a filter for the new PHV1810 model of Black & Decker Pivot Vac 18V Cordless Pivoting Hand Vac. These filters are different in size and shape from the previous popular model PHV1800 (which took PVF100).
A friend of mine has PHV 1800 and I was hoping to buy the same model so we can share the filters my friend bought in bulk. However by the time I got around to buying the vacuum, 1800 was not available, and 1800 filters do not fit 1810 model. Not surprisingly, as B&D wants to sell more filters for the new model.
Be careful when you buy replacement filters, as there are still lots of filters for PHV 1800 on the market.
The PVF110 filters work well. They are quite easy to clean without getting dust all over yourself. They are also easy to remove and replace. I get some extra live out of them by washing and re-using when they get dirty. I usually remove one, wash it, and while it dries install another filter and rotate as needed. However, I have not had to do this often, these filters need cleaning less frequently than my Eureka Upright.
Black & Decker Pivot Hand Vac is an excellent vac (see my review of this vacuum), and having easy to work with filters add to my satisfaction with this product.
I purchased PHV 1810 over a year ago, and I am very pleased with it. It has really good suction and is fairly easy to clean without getting dust all over yourself. It definitely works better than any other cordless vacuum I have had in the past. It easily picks up not only dust but small objects (like small stones on the car mat) as well.
A friend of mine has PHV 1800 and I was hoping to buy the same model so we can share the filters my friend bought in bulk. However by the time I got around to buying the vacuum, 1800 was not available, and 1800 filters do not fit 1810 model. Not surprisingly, as B&D wants to sell more filters for the new model. (Be careful when you buy replacement filters, as there are still lots of filters for PHV 1800 on the market)
A typical death for these units comes when the battery dies, and since the manual contains instructions for battery removal I spent some time investigating if it is possible to replace the battery to prolong the life of the unit. I found out from Black and Decker that the battery is not replaceable. The removal instructions are given only for proper disposal of the battery when the unit is no longer working.
I have been using the vacuum regularly for more than a year later (at least once a week, sometimes more), and I am still very pleased with the vacuum. The suction is still excellent, I am still using the original filter, and in my use I have not noticed the battery deterioration yet. For the amount of time I use it is still as good as when I bought it. A typical job for me, for example, is vacuuming a car which takes 8-10 minutes or vacuuming small area rugs which takes 5-6 minutes.
I ever need to replace this vacuum I will not hesitate to buy another one just like it.
About a year ago I became interested in weaving and purchased Beka Rigid Heddle Loom to see if I would enjoy weaving. I have completed several projects on this loom and I really do enjoy it. I was able to create several scarves and sashes which are 4 feet long.
This review contains what I learned about this loom and additional items I needed to purchase/make to help me use and enjoy it.
This loom does not limit you too much in the length of the textile
you produce, just the width. I made 4 feet long scarves and could have made them a few feet longer if I wanted. The threads that will be used in the textile are wrapped around the board at the top of the loom (called warp beam) and the finished textile tangles from the front of the loom. This loom does not have a cloth beam on which the fabric can wrapped. As you make fabric you upwrap the threads from the warp beam and pull it down between the boards at the bottom tightening the hand screws to put the threads in tension for weaving. You can see this illustrated in the photos I am attaching to this review
Additional items needed:
This loom does not come with a few items that you will need for weaving. I read a few books and watched a few videos to understand what tools are needed and made most of them myself.
(1) You will need a warping board. This is a tool that allows you to measure out threads to put on the loom. I created one by purchasing a 1 foot board and 1/2 inch dowel from a local home improvement store. I asked the clerk to cut 1/2 inch dowel in two 9 inch pegs. I drilled two 1/2 inch holes in the board and put dowels into it gluing them for extra security. My dowels are 4 inches apart. If I were to do it again, I would put them 5 inches apart. I put a piece of felt on the bottom of the board. I also bought two C clamps to attach the board with pegs to my work table to create one end of a steady warp board. The leftover length of the 1/2 dowel is the second end of the warp board. I tie it to the chair and this allows me to place the second end as far as I need from the pegs on the board to measure out the length of the threads I need for the project. So for example, if I am planning to make a 4 foot scarf, I would put the dowel attached to the chair 5 feet away from the 9 inch pegs to give myself a foot for thread salvage. You can buy a warping board for about $120 dollar at a loom store. My solution cost under $10 dollars.
(2) You will also need a pick-up stick, which will allow you to pick up threads if you want to make a design. I got a stick which is used for mixing paints, and used sanding paper to create a pointy end. This took only a few minutes and made a tool which otherwise would cost a lot more. See photo of the tools I created.
(3) Dressing the loom can be challenging, if you don't keep all the threads straight it may take much longer then necessary. The most important thing is to come up with a way to hold your heddle while you are dressing the loom. I am attaching a photo of the system of clamps I came up with after several months of using the loom. I sped up the dressing of the loom tremendously with a few simple clamps and brackets I found in a local home improvement store. I wish I came up with this system earlier - I hope sharing this idea will save you time and frustration.
A paint mix stick is attached to the loom by a small clamp. This gives clearance on both sides of the heddle so you can approach it from both sides for dressing. The paint stick is attached to a metal bracket with another small clamp. And the metal bracket is attached to the table with a big clamp. The whole system takes about 1 minute to set up, and saves at least 30 minutes of fussing with threads.
(4) If you want to change colors in your design you will need another stick shuttle (the loom comes with one). Having more than one shuttle allows you to keep weaving without having to unwind the thread from the shuttle that comes with this loom which is time consuming and cat get your threads tangled. You can make your shuttle stick from the paint mixing stick by making notches at both end of the stick and then using sand paper to smooth out the notches.
What I like about this loom:
1. It let me try weaving without paying lot of money for a big loom
2. It is built solidly and works well
3. It is easy to use, it did not take me long to figure out how to weave
4. I liked that the loom came threaded, so it allowed you to start with weaving rather than "dressing" the loom (which is more tedious and complex than the weaving).
What I did not like about this loom:
1. The instructions that come with the loom are not sufficient to get you started if you are a novice
I had to read several books and videos to get me started. This not a big deal, just letting you know that you would need extra information to avoid being frustrated.
Since I started to weave the most helpful book for mastering weaving has been by Deborah Chandler "Learning to Weave."
2. The screws that create tension at the bottom of the loom tend to catch threads
3. When the piece is long and it tangles from the front of the loom you need to be careful not to step on it or run it over with you chair
4. Because you use one heddle at a time you are can't do fancy designs. But given that this is beginner loom this is to be expected.
Overall, I am very pleased with the loom and my new hobby!
A good video on dressing a rigid heddle loom is this one. It is not specific to Beka rigid heddle loom, but many concepts are applicable to any rigid heddle loom.
Perfect fit for SONY NEX 5N - exactly what I was looking for
I purchased this neoprene sleeve for SONY NEX-5N camera, whose size is 4 1/8 inches wide x 1 inch wide in the narrow part, and 4 2/8 width if measured including the 18-55mm Lens.
I wanted to have something snug around the camera to protect the LCD screen if I take it out of the camera bag and put it in jacket pocket or carry it in my purse.
This sleeve is perfect. It is a nice fit, not too tight, but it takes little amount of extra space. I have about 1 inch of space left at the lens end, so it has room to fit a bigger lens.
Photo #1 shows the Fotodiox neoprene sleeve next the SONY camera cap for size reference. As you see the coloring of the sleeve is slightly different than the stock photo. There is no grey color edging on the sleeve, and I like it better this way than the stock photo version.
Photo#2-#4 :
Photo #2 shows the camera next to the sleeve. The flaps of the sleeve have Velcro and close around the camera once it is inserted into the sleeve.
Photos #3 and #5 show different angles of the camera inside of the sleeve before the velcro is closed. My camera has a filter and a quick release plate attached to the body.
Photo #4 shows the camera inside the sleeve with the Velcro closed. I show the dimensions of the closed sleeve. 6 inches by 6.5 inches. The tip (lens end) of the sleeve has about 1 inch empty, so a slightly larger lens will fit into the same sleeve.
Overall, I am very pleased. The fit is ideal, it looks decent, and construction quality is good.
I was looking for a light tripod for SONY NEX 5N, which is 17.1 oz with its 18-55mm lens. My choice was between GorillaPod GP2 (an older version that has over a hundred great reviews on Amazon.com) and this new model GorillaPod Hybrid (which had no reviews at the time I bought it). I decided to go with the new model for two reasons: it supports slightly heavier cameras (giving me room to add a bigger lens to this camera) and has dual action knob for horizontal and vertical orientation.
The tripod fits my camera perfectly: the quick release fits tightly and holds the camera securely. I tried wrapping the legs on various odd objects and various angles, it worked extremely well! Even when I press the button to take a photo there is no noticeable bounce. In a low light I would use a timer, which I do even with a regular tripod. An added bonus I did not expect is that it fits into my camera bag if I tilt down the head.
Below are some details I collected while deciding which GorillaPod will be the best for my camera. I hope others will find the summary useful as well. The most important thing is to buy the GorillaPod that can handle the weight of your camera (with the heaviest lens it takes, battery, etc).
Comparison of the old GP2 GorillaPod vs the new Joby GorillaPod Hybrid:
New: Dual action knob for horizontal and vertical movement for portrait or landscape orientation
New: Supports up to 2.2lbs [34 oz] compared to 1.75 lbs [23.4 oz] for GP2
New: Its weight is 6.4 oz compared to 5.8 oz for GP2
GorillaPod Original:
For point and shoot cameras up to 11.5 oz
Its weight 1.6 oz
Old GorillaPod SLR:
For SLR cameras up to 1.75 lbs
Is weight 5.8oz
New GorillaPod Hybrid:
For SLR cameras up to 2.2 lbs
Its weight 6.4 oz
GorillaPod SLR-Zoom:
For SLRs with zoom lenses up to 6.6 lbs
Its weight 8.5 oz
GorillaPod Focus:
For SLRs with big zoom lenses up to 11 lbs
Its weight 1.1lb
Common to all:
All have quick release
All have bubble level
Overall this is great tripod and so light. I am looking forward to traveling with it instead of several pounds of the old trusty Manfrotto tripod.
This was the first time I bought something because of a TV commercial. It looked so simple, easy and convincing.
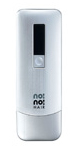
But this product is nothing like it claims. First of all, it is finicky to use and often did nothing (you can tell because the light was not flashing). When I got the light flashing it was extremely time consuming. I spent a lot of time on a small area, because it did not always work and needed multiple swipes to produce any sort of result. To treat a large area you would need to spend hours on it. It can manage only light and fine hair that almost invisible anyway. The product claims that it will not grow back over time, but the hair does grow back.
I bought the product on a special discount using the promo on the TV commercial. I was worried about getting my money back given how false the other claims were. It took some aggressive screaming over the phone to get them to give me a refund, but they never refunded the cost of shipping the No!no! unit back even though in their advertising they promise it.
I DID NOT LIKE:
1) Hard to use
2) Did not work on all hair
3) Took a lot of time to produce poor results
4) Hair grew back
5) Return process was difficult